
Overview
We have an Electromaxx Solar Maxx 10 watermaker. I spent a number of hours trying to figure out how best to place the parts of the watermaker. This is the best arrangement I could figure out. We “lost” some storage space around the place under the v-berth behind the water tank but have not noticed that much. We already seem to be “bow heavy” with anchor chain that we carry (200ft chain plus rope road).
We have a manual process still for filling the tanks but that’s fine as I am typically filling the time doing other jobs on the boat while the watermaker is running and the bit of time for tank filling is minimal.
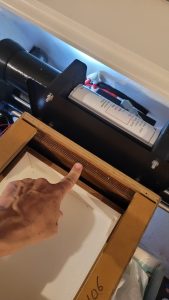
Drawer unit under V-berth
Clark pump fastened on the front of the drawer unit toward the water tank. The back of the drawer unit was re-enforced with additional marine plywood to provide strength and stiffness. I am pointing at the extra that I added behind the drawers.
The high pressure pump and filter was fastened to the port side of the drawer unit. Again some marine plywood added for strength and stiffness.
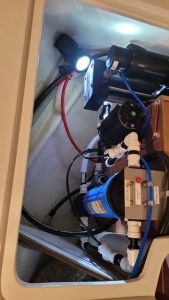
I did glass in some tubing to run the raw water supply line from the head. I added this on top of the existing tubing that was there for the water tank supply line from the forward tank.
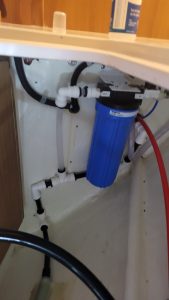
Bulkhead to the head
The carbon filter was placed on the bulkhead wall between v-berth and the head. There was clearance beside the fold out storage bin. A hold was cut in the bulkhead to allow salt water supply, fresh water (for flush) supply, product line and brine line.
Thru-hull access in the head
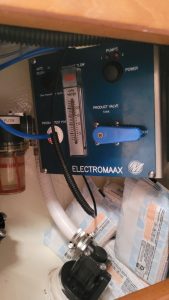
The control was placed in the corner of the thru-hull access area. Some wood was added to allow the “angled” mounting in this location. The salt water supply was teed of the head supply after the filter using a Y-valve. The power control box was placed inside the area of the toilet paper holder area.
Brine and product lines
Rather than try running product supply lines to each tank and having valves to control the flow we simply have the test flow out go into a jerry can. We used jerry cans the first year so already have two. So fill a jerry can then once full fill the second jerry can filling. We take the full JC on to the deck and fill which ever tank we need.
The brine line I have not yet put a thru-hull out. We simply open the head window and run the brine line out it to dump water over board.
Only “trouble” with the arrangement as the head water thru-hull is being used for the watermaker we can’t flush the head. But that is just a matter of timing and control 🙂
Recent Comments